Oreo Icebox Cake

When you crave something sweet yet uncomplicated, Oreo Icebox Cake emerges as the answer. Layers of dreamy whipped cream and rich Oreo cookies come together in a delightful union that feels indulgent without demanding hours in the kitchen. As the name indicates, this dessert is chilled rather than baked, allowing every layer to meld beautifully, creating a texture that’s at once creamy and satisfying. It’s like enjoying a bite of soft, chocolatey clouds that melt in your mouth, making it a superb choice for gatherings or just treating yourself mid-week.
Table of Contents
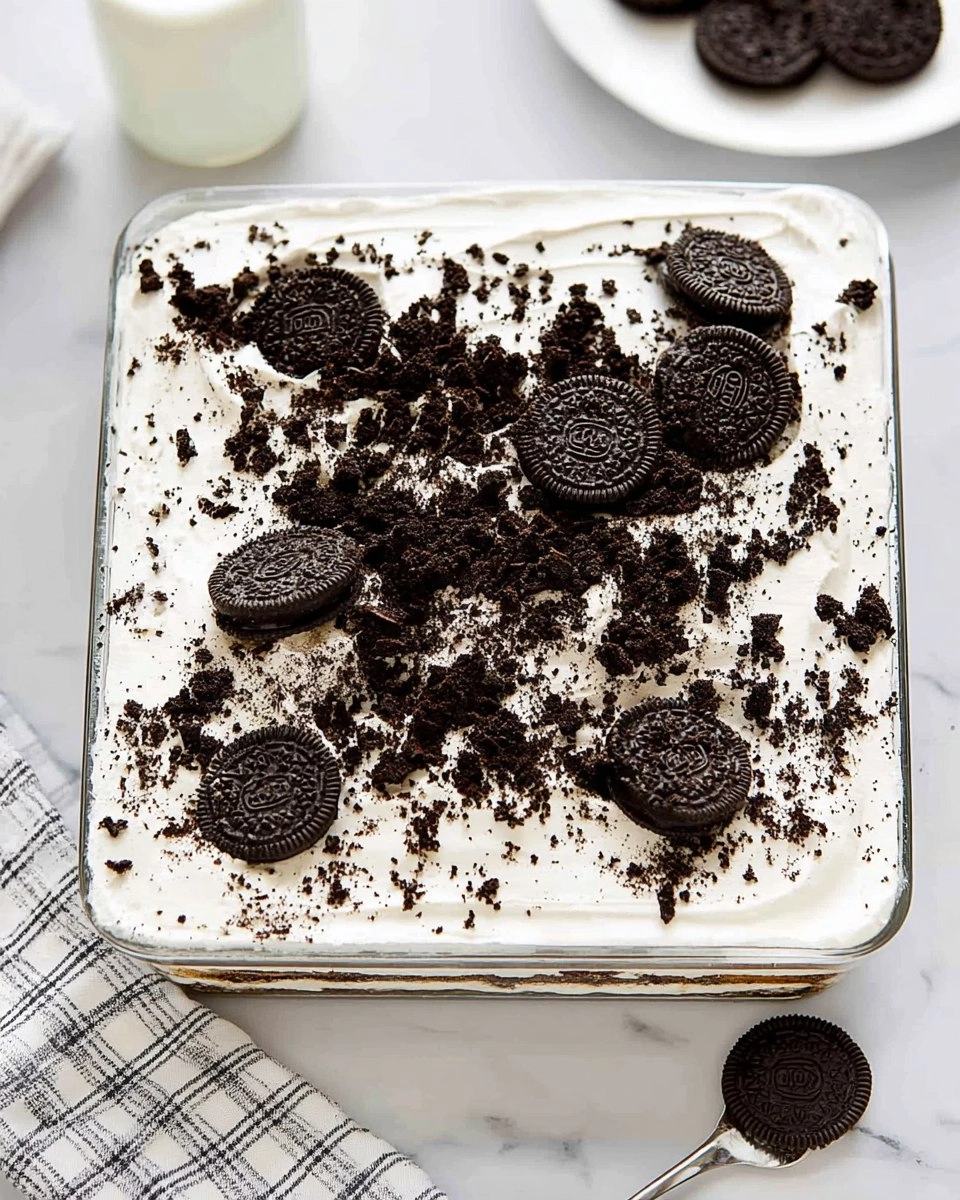
My first experience with this dessert was during a summer backyard barbecue. The sun was shining, laughter filled the air, and someone brought out a pan covered in whipped sweetness. I’ll never forget that first bite—the way the cookies softened just enough to provide a slight chewiness amidst the fluffy mixture—pure bliss. Best of all, the simplicity of this recipe means that anyone can make it, whether they’re a beginning baker or a seasoned pro. I’m excited to share this delightful concoction with you because it not only pleases a crowd but also brings back fond memories!
Why You’ll Love This Recipe
- Simple & Quick: This delightful cake comes together in under 30 minutes, with just a few steps to follow.
- Irresistible Flavor: With the classic flavors of Oreo cookies along with a creamy filling, each slice is a sweet sensation.
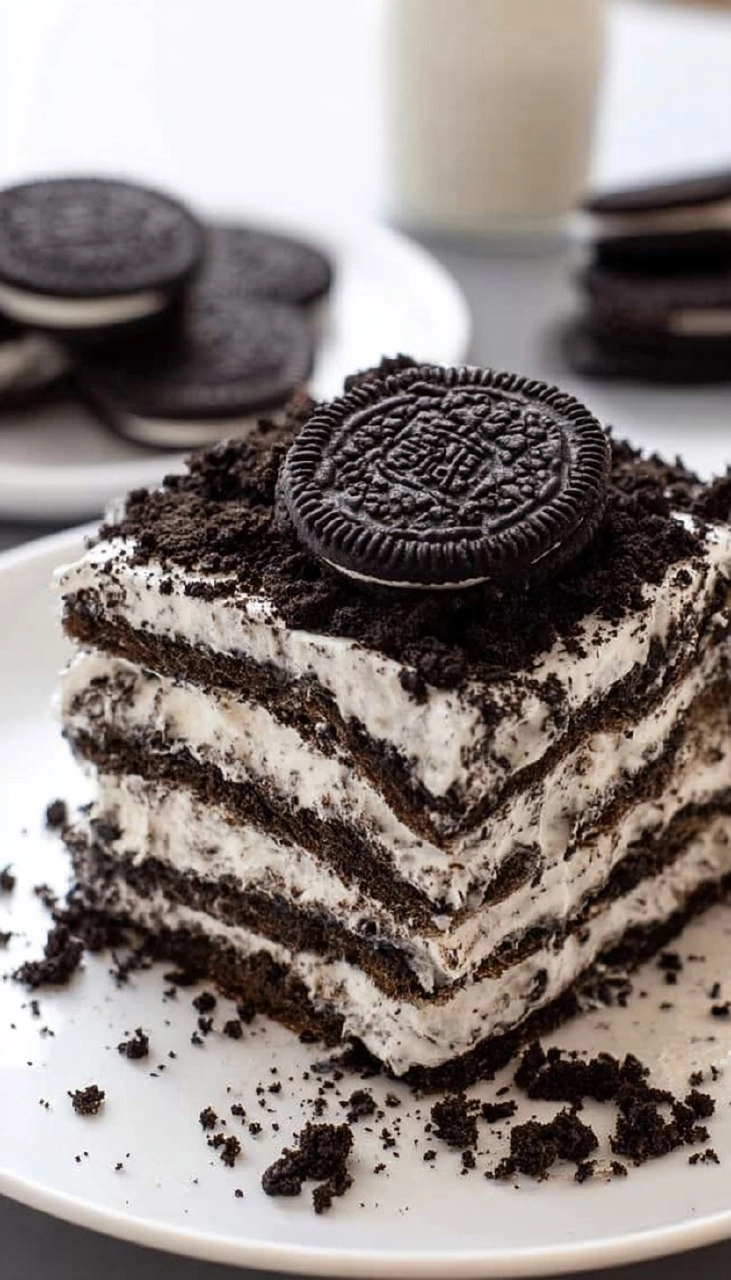
- Eye-Catching Appeal: The layers create a stunning visual, making it perfect for parties or special occasions.
- Flexible Serving: Great for any occasion—enjoy it as a dessert, snack, or even as a sweet breakfast treat!
- Diet-Friendly Options: Easily adaptable to gluten-free cookies if needed, keeping everyone happy.
Ingredients You’ll Need
- 48 Oreo cookies: The star of the show, these provide the chocolatey crunch and flavor that makes the dessert irresistible. For a gluten-free version, you can substitute with gluten-free sandwich cookies.
- 4 ounces cream cheese, softened: This adds a rich texture and slight tang to the whipped cream. Make sure it’s at room temperature for easy mixing.
- 2 ½ cups (595 g) heavy whipping cream, cold: Cold cream is essential for achieving the fluffy texture. Do not substitute with lighter creams as they won’t whip up properly.
- ½ cup (62.5 g) confectioners’ sugar: This sweetens the whipped cream and provides a smooth texture. If you prefer, granulated sugar can be used but the final texture may differ slightly.
- 1 teaspoon vanilla extract: Adds a lovely aroma and flavor; opt for pure extract for the best taste.
- Crushed Oreo cookies: These are sprinkled on top for extra texture and a finishing touch, making this cake look as delicious as it tastes.
How to Make Oreo Icebox Cake
- Chill Your Equipment: Place the bowl of a stand mixer and the whisk attachment in the freezer for 15 to 20 minutes. This helps achieve a fluffier whipped cream.
- Beat the Cream Cheese: In the chilled bowl, beat the 4 ounces of cream cheese until it’s smooth and creamy.
- Add the Cream: Pour in 2 ½ cups of cold heavy whipping cream, followed by ½ cup of confectioners’ sugar and 1 teaspoon of vanilla extract. Beat on medium-high speed until you get stiff peaks—take care not to overdo it.
- Begin Layering: Spread a thin layer of the whipped cream mixture into the bottom of an 8×8-inch baking dish. This first layer helps keep the cookies in place.
- Arrange the Cookies: Lay a single layer of 48 Oreo cookies over the whipped cream, breaking a few cookies, if necessary, to fit the dish.
- Add More Whipped Cream: Spread about one-third of the remaining whipped cream mixture evenly over the cookies.
- Repeat the Process: Repeat the layers two more times, always ending with a final layer of whipped cream on top for that creamy finish.
- Finish with Crushed Oreos: Sprinkle crushed Oreo cookies on top for added crunch and decoration.
- Refrigerate: Cover the dish tightly and refrigerate for 6 to 8 hours, or overnight for best results. This allows the cookies to soften and the flavors to meld beautifully.
- Serve Cold: For the cleanest slices, pop it in the freezer for 20 to 30 minutes before cutting. Then enjoy that luscious texture!
Storing & Reheating
To keep your Oreo Icebox Cake fresh, store it tightly covered in the refrigerator for up to 5 days. If you want to keep it longer, feel free to freeze individual slices in an airtight container for up to 3 months. Just remember that texture might change slightly upon thawing, so letting it sit at room temperature for a few minutes can help restore some of its original fluff.
Chef’s Helpful Tips
- Don’t Overbeat: When whipping the cream, aim for stiff peaks but avoid overbeating, which can turn your mixture grainy.
- Room Temperature Cream Cheese: Ensure the cream cheese is soft to avoid lumps in your mixture.
- Layering Technique: For even layers, spread the cream gently to avoid breaking the cookies.
- Make Ahead: This dessert is even better the next day, making it perfect for prep ahead of gatherings!
- Experiment with Flavors: Add a splash of mint extract for a twist, or top the cake with chocolate drizzle for added decadence.
Each bite of this treat brings back a wave of nostalgia while offering a delightful twist to anyone’s palate. The Oreo Icebox Cake combines simplicity with unforgettable flavor, making it a must-try dessert. So gather your ingredients, roll up your sleeves, and experience the joy that this cake can bring.
Recipe FAQs
Can I use different cookies for this recipe?
Absolutely! While Oreo cookies are classic, feel free to experiment with other chocolate sandwich cookies or even flavored varieties like peanut butter or lemon. Just keep the measurements the same.
How long does this cake need to set?
A minimum of 6 hours is recommended, but if you can let it sit overnight, the flavors and textures enhance remarkably, making it even more delicious!
What if my whipped cream won’t thicken?
Ensure your heavy whipping cream is well-chilled and your bowl and beaters are also cold. If it still doesn’t thicken, it might be that the cream isn’t fresh or was not handled properly.
Can I make this a day in advance?
Yes! This cake actually benefits from a day in the fridge as the flavors meld beautifully over time, and the cookies soften perfectly. It will be an instant hit at your gathering!
PrintMore Desserts & Appetizers Recipes
- Caramel Apple Cider Cookies
- Berry Galette
- Homemade Apple Cider Syrup
- Healthy Strawberry Crisp (Gluten Free, Easy Almond Flour Crumble)
- 2 Ingredient Garlic Parmesan Breadsticks
Did You Enjoy Making This Recipe? Please rate this recipe with ⭐⭐⭐⭐⭐ or leave a comment.
📖 Recipe Card
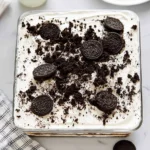
Oreo Icebox Cake
- Prep Time: 15 minutes
- Cook Time: 0 minutes
- Total Time: 15 minutes
- Yield: 9 servings 1x
- Category: Desserts & Appetizers
- Method: No-bake
- Cuisine: American
Description
Oreo Icebox Cake combines the creamy richness of whipped cream and cream cheese with the crunch of Oreo cookies. This no-bake dessert is perfect for gatherings, offering a delightful balance of textures that everyone will love. Perfect for any occasion!
Ingredients
- 48 oreo cookies
- 4 ounces cream cheese, softened
- 2 ½ cups (595 g) heavy whipping cream, cold
- ½ cup (62.5 g) confectioners' sugar
- 1 teaspoon vanilla extract
- Crushed Oreo cookies
Instructions
- Chill the bowl of a stand mixer and whisk attachment in the freezer for 15 to 20 minutes.
- In the chilled bowl, beat the cream cheese until smooth. Add the heavy whipping cream, confectioners’ sugar, and vanilla extract. Beat on medium-high speed until stiff peaks form, being careful not to overbeat.
- Spread a thin layer of the whipped cream mixture into the bottom of an 8×8-inch baking dish.
- Arrange a single layer of Oreo cookies over the whipped cream, breaking a few cookies if necessary to fit.
- Spread about one-third of the remaining whipped cream mixture evenly over the cookies.
- Repeat the layers two more times, finishing with a final layer of whipped cream on top.
- Sprinkle crushed Oreo cookies on top.
- Cover tightly and refrigerate for at least 6 to 8 hours, or overnight. The cookies will soften as the cake chills, creating a cake-like texture.
- Serve cold. For clean slices, freeze the cake for 20 to 30 minutes before cutting.
Notes
For an even richer flavor, you can add a layer of chocolate pudding between the whipped cream and Oreo layers.
This cake can be prepared a day in advance for best results, allowing the flavors to meld together.
Feel free to garnish with additional crushed Oreos on top for a more decorative finish.
Nutrition
- Serving Size: 1 slice
- Calories: 350
- Sugar: 20g
- Sodium: 150mg
- Fat: 26g
- Saturated Fat: 15g
- Unsaturated Fat: 10g
- Trans Fat: 0g
- Carbohydrates: 33g
- Fiber: 2g
- Protein: 4g
- Cholesterol: 80mg